Introduction
In this post, I introduce a simple search application in the background of Amazon CloudSearch and domain Digital Asset Management (DAM). The primary objective of this search application is to exhibit search capabilities of Amazon CloudSearch with the functionality of Digital Asset Management. Further, we will also will setup and deploy the search application and see it from an end to end perspective.The application will have source code examples for essential DAM functionalities like digital asset file upload, metadata extraction and storing file related information in a persistence store & search store. We will also share the application source code that will help developers to reuse, extend and customize further.
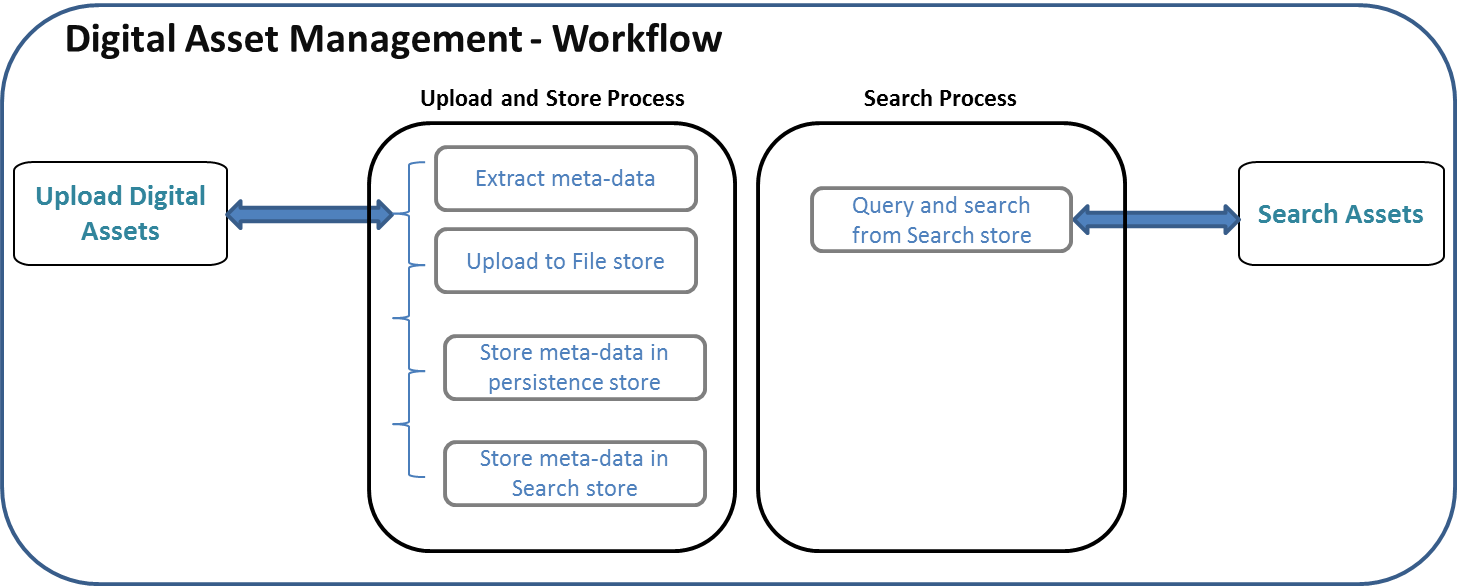
The below illustration depicts the system workflow of the DAM search application.
System Flow
Technology stack
The DAM search application is built using Java programming language. The functionality of DAM is developed in API model. It requires only a light weight servlet container to execute the API services. In this application, we have also used fault-tolerant Amazon Web Services like CloudSearch, S3, and DynamoDB. The below table summarizes technology stack used in the application.| Frond end | HTML |
| Back end | Java 8, AWS SDK |
| File store | Amazon S3 |
| Search | Amazon CloudSearch |
| Persistence store | Amazon DynamoDB |
| AMI | Amazon Linux HVM Image (If application hosted in Amazon EC2) |
| Other Front end tools | AngularJS, EvaporateJS |
| Servlet container | Embedded Jetty |
Please note that this blog post is intended for novices and experienced users alike. We expect readers to have Java programming knowledge and AWS experience. It is nice to have search background but not mandatory.
At the end of this tutorial, you should able to setup and deploy the application using the above mentioned technology stack and execute essential search functionalities like basic search, faceting and highlighting. We also encourage you to develop and customize new functionalities in this application by extending the source code. The download link of application source code can be found in the following sections.
Application Setup
In this section, we detail step-by-step instructions on build, deployment, and setup of the DAM application.Pre-Requisites
The following pre-requisites have to be completed before proceeding to next set of activities. The pre-requisites include installations and configuration of dependent software and DAM application. The following installations and configuration should be done on the server that will host the DAM application.Note 1: The application can be hosted either on-premise or on Amazon EC2. If it is an on-premise hosting, ensure the firewall is correctly set for outbound access.
Note 2: We recommend to host the application in a Linux based operating as some of the dependent tools have limited support for non-Linux operating system. The following steps apply only for Linux environment.
1.The application is developed using Java. Download and Install Java 8 .Validate the JDK path and ensure the environment variables like JAVA_HOME, classpath, path is set correctly.
2.Gradle is used for application build. Download latest Gradle version from the below link.
http://www.gradle.org/downloads
3.The application repository is hosted on Git. Download Git in the below link.
http://git-scm.com/book/en/v2/Getting-Started-Installing-Git
4.Download the application source code from
https://github.com/8KMiles/amazon-cs-dam/archive/master.zip
or
Use the following command to clone the application source from Git.
git clone https://github.com/8KMiles/amazon-cs-dam.git (requires Git installation)
Copy the source code in your working directory.
5.‘FFMPEG‘ is used for extracting meta-data from the digital assets. Download this tool from http://johnvansickle.com/ffmpeg/releases/ffmpeg-release-64bit-static.tar.xzRun the following commands to setup ‘FFMPEG’
unxz ffmpeg-release-64bit-static.tar.xztar -xvf ffmpeg-release-64bit-static.tar{In the above commands, we have downloaded ffmpeg, extracted it and copied the ‘ffprobe’ executable file to user local binary directory}
cd ffmpeg-2.6.3-64bit-static/
cp ffprobe /usr/local/bin/
AWS Setup and configuration
In this section, we set up and configure AWS services required for the application.1.We assume you already have setup Amazon Web services IAM account. Please ensure the IAM user has the right permissions to access AWS services like S3, DynamoDB and CloudSearch.
Note: If you do not have an AWS IAM account with above mentioned permissions, you cannot proceed further.
2.The IAM user should have AWS Access key and Secret key. In the application hosting server, set up the Amazon environment variables for access key and secret key. It is important that the application runs using the AWS environment variables.
To setup AWS environment variables, please read the below link.
http://docs.aws.amazon.com/AWSSdkDocsJava/latest/DeveloperGuide/credentials.html
http://docs.aws.amazon.com/AWSSdkDocsJava/latest/DeveloperGuide/java-dg-roles.html
Alternatively, you can set the following AWS environment variables by running the commands below from Linux console.
export AWS_ACCESS_KEY=Access Key3.Note: This step is applicable only if the application is hosted on Amazon EC2.
export AWS_SECRET_KEY=Secret Key
If you do not have an AWS Access key and Secret key, you can opt for IAM role attached to an EC2 instance. A new IAM role can be created and attached to EC2 during the instance launch. The IAM role should have access to AWS resources like S3, DynamoDB and CloudSearch.
For more information, read the below link
http://docs.aws.amazon.com/AWSEC2/latest/UserGuide/iam-roles-for-amazon-ec2.html
4. Amazon S3 is used for storing the digital assets uploaded by the end-user.
a.Create a S3 bucket with a project relevant name (Example: amazon-cs-dam)
b.The S3 bucket should have list and upload permissions for the ‘Everyone’.
http://docs.aws.amazon.com/AmazonS3/latest/gsg/CreatingABucket.html
5. DynamoDB is used as the persistence store for storing the application related data, meta-info of the digital assets.
a. Create DynamoDB table with a one hash key. It is nice to have a relevant table name based on the application (Example: amazon-cs-dam)
b. The read and write throughput can be default. It can be changed later based on application requirements.
http://docs.aws.amazon.com/amazondynamodb/latest/developerguide/GettingStartedCreateTables.html
6.CloudSearch is used as the search layer of this application.
a. Create a CloudSearch domain, name relevant to the application. (Example: amazon-cs-dam)
http://docs.aws.amazon.com/cloudsearch/latest/developerguide/getting-started-create-domain.html
b.Use the following for other inputs of CloudSearch creation
| Engine Type | CloudSearch (2013 API) |
| Desired Instance Type | Use default |
| Desired Replication Count | Use default |
| Configure Index | Manual Configuration |
| Index Fields | file_name – textformat – textduration – textbitrate – textsize – texts3_url – text |
| Access policies | ‘Search and Suggester service: Allow all. Document Service: Account owner only’ |
Application build and deployment
1. After pre-requisites activity, validate Java path, Gradle path, and environment variables are set correctly.2. Copy the downloaded DAM application source code to your working directory.
The content of DAM application should have the following directory structure
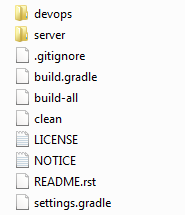
a.The source code of the application can be found inside the directory /server/src
3. Run the following command in your base of working directory. This gradle command will build the DAM application and generate the build output.
| gradle :server:installDist |
b.The directory of /server/build should have the following directory structure
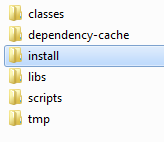
c.The highlighted ‘install’ is the most important directory as ‘server deployment content’ is stored here. The content of install directory will have a sub-directory ‘server’ and under that the following directory structure will be found. (Example: DAM BASE DIRECTORY/server/build/install/server)
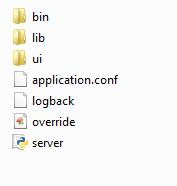
4. The directory (DAM BASE DIRECTORY/server/build/install/server) is the final output of the build. Under this directory, you will find an executable called server.py
Run the below command to start the server.
About Configurations
5. The server deployment content is briefed in the below tabulation
| Folder / Files | Description |
| bin | Binaries of the application |
| lib | Libraries required to run the application |
| ui | User interface directory |
| application.conf | Configuration file that allows end users to input parameters |
| logback.xml | Log file and log path configuration |
| server.py | Application server executable file |
6.application.conf - The parameters configured in the in the application.conf file are explained in the table below.
| server {port = 8080host = "0.0.0.0"probe-cmd = "/usr/local/bin/ffprobe -v quiet -of json -show_format -show_streams"tmp-store-dir = /tmpdebug = false | port – Application server port. Ensure no other application run on the same port |
| host – Application host name | |
| probe-cmd = ffmpeg probe command {do no change this. Leave the default setting} | |
| tmp-store-dir = digital assets meta extract temp path | |
| Debug | |
| aws {s3 {upload-bucket = amazon-cs-damkey-prefix = uploadupload-access-key = ${?S3_UPLOAD_AWS_ACCESS_KEY}upload-secret-key = ${?S3_UPLOAD_AWS_SECRET_KEY}}dynamodb {table-name = amazon-cs-damhash-key = id}cloudsearch {upload-endpoint = ${?UPLOAD_ENDPOINT}search-endpoint = ${?SEARCH_ENDPOINT}}} | upload-bucket = S3 bucket name where digital assets are stored |
| key-prefix = Key-prefix of the upload object | |
| upload-access-key = AWS IAM user Access Key | |
| upload-secret-key = AWS IAM user Secret Key | |
| DyanmoDB table name | |
| Hash key Id of the DyanmoDB table name | |
| CloudSearch domain upload end point | |
| CloudSearch domain search end point |
About the Application
In this section, we detail the API services with source code explanation. This will guide to understand the search functionalities and how it is implemented in Amazon CloudSearch. The application primarily supports two functions, Upload and Search.Upload Functionality
The upload functionality is described as below.
- Store the uploaded media asset in S3,
- Extract the meta-data of the file using the tool ‘FFMPEG’
| Java Class | amazon.cs.dam.api. Api |
| API Name | /probe |
| CloudSearch class | amazon.cs.dam.service.impl. CloudSearchService |
| URL | |
| Description | Upload Digital Asset |
| List of Tasks | 1. Extract meta data using ‘ffmpeg’,2. Store the file in S33. Store file name, meta information, s3 information in DynamoDB4. Store file meta information in CloudSearch |
CloudSearchService.java – Line number 114
public void index(Map<String, Object> map) {
String json = Utils.toJson(Arrays.asList(Utils.newMap("type", "add", "id", map.remove("id"), "fields", map)));
if (json != null) {
LOG.debug("CS: {}", json);
try {
csd.uploadDocuments(new UploadDocumentsRequest().withDocuments(new StringInputStream(json))
.withContentLength((long) json.length()).withContentType(ContentType.Applicationjson));
} catch (UnsupportedEncodingException e) {
LOG.debug("", e);
}
}
}
Search Functionality
| Java Class | amazon.cs.dam.api. Api |
| API Name | /search |
| URL | |
| Description | Search Digital Asset |
| List of Tasks | 1. Search assets |
CloudSearchService.java – Line number 56
@Override
public Object search(Map<String, String[]> parameterMap) {
 SearchRequest req = new SearchRequest();
 req.withHighlight(DEFAULT_HIGHTLIGHTS_JSON);
 req.withFacet(DEFAULT_FACETS_JSON);
 req.withReturn(DEFAULT_RETURN_FIELDS);
 req.withSort(DEFAULT_SORT_ORDER);
 req.withQuery(DEFAULT_QUERY);
 req.withQueryParser(DEFAULT_QUERY_PARSER);
 for (Entry<String, String[]> entry : parameterMap.entrySet()) {
 String[] values = entry.getValue();
 String value = values[0];
 switch (entry.getKey()) {
 case "cursor":
 req.withCursor(value);
 break;
 case "expr":
 req.withExpr(value);
 break;
 case "facet":
 req.withFacet(value);
 break;
 case "fq":
 req.withFilterQuery(value);
 break;
 case "highlight":
 req.withHighlight(value);
 break;
 case "partial":
 req.withPartial(Boolean.parseBoolean(value));
 break;
 case "q":
 if (value.length() != 0 && !"*".equals(value))
 req.withQuery(value);
 break;
 case "q.options":
 req.withQueryOptions(value);
 break;
 case "q.parser":
 req.withQueryParser(value);
 break;
 case "return":
 req.withReturn(value);
 break;
 case "sort":
 req.withSort(value);
 break;
 case "start":
 req.withStart(Long.parseLong(value));
 break;
 case "size":
 req.withSize(Long.parseLong(value));
 break;
 }
 }
 return this.search.search(req);
}
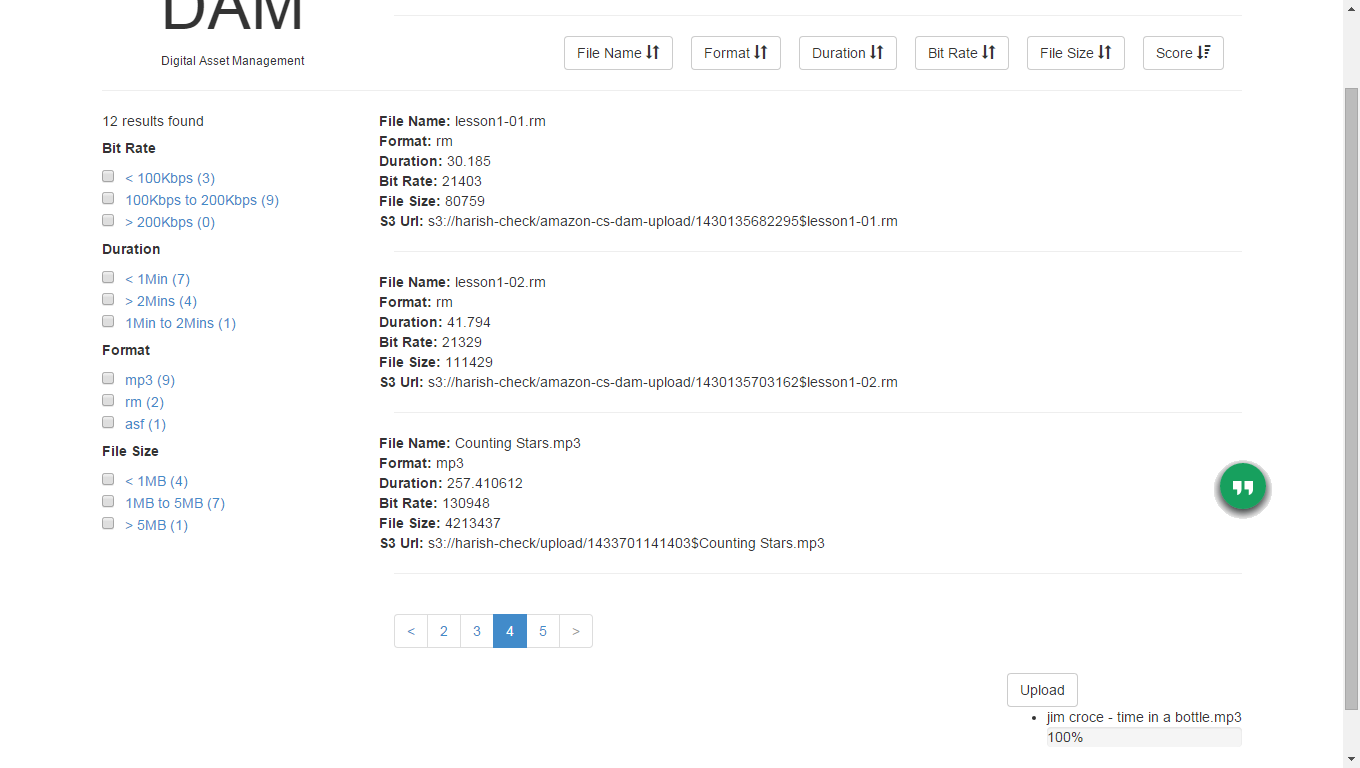
[caption id="attachment_5112" align="alignnone" width="660"]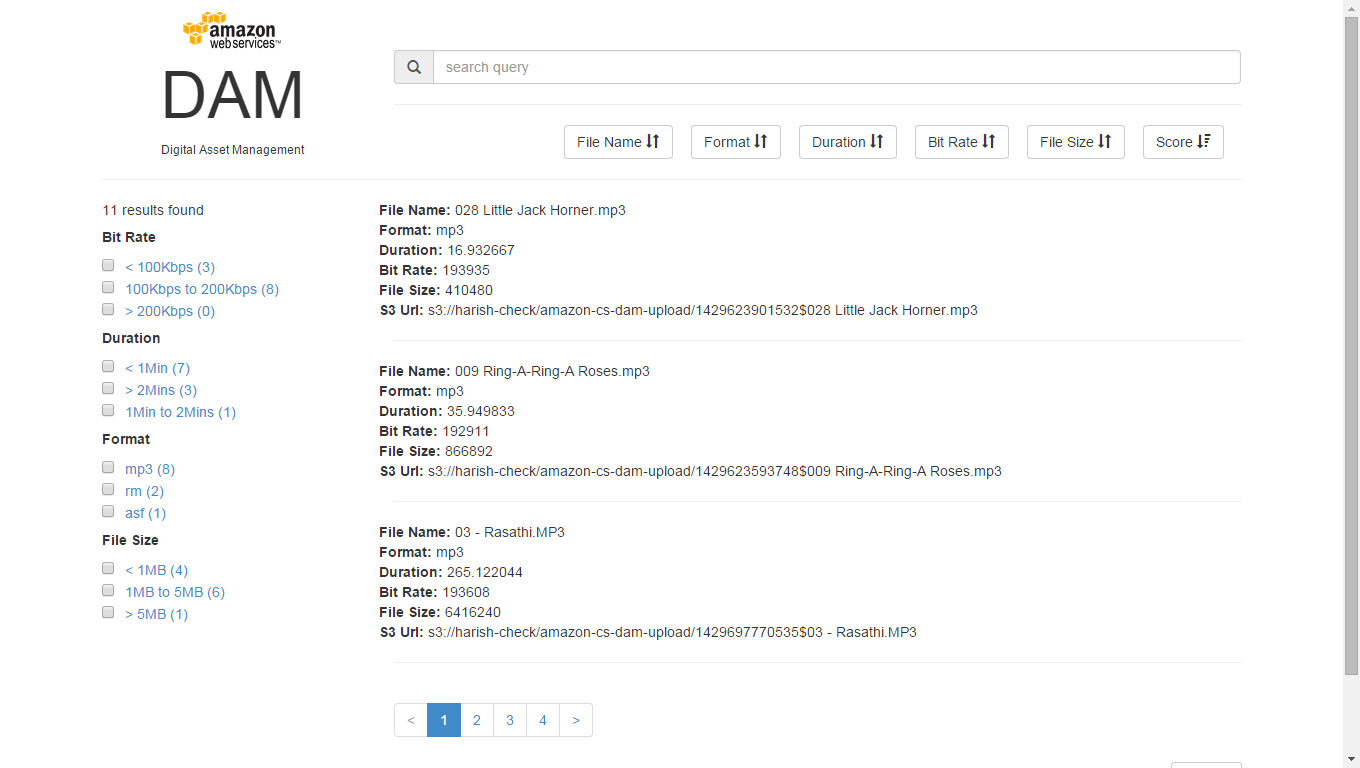 Search Service[/caption]
[caption id="attachment_5112" align="alignnone" width="660"]
Search Service using Query String[/caption]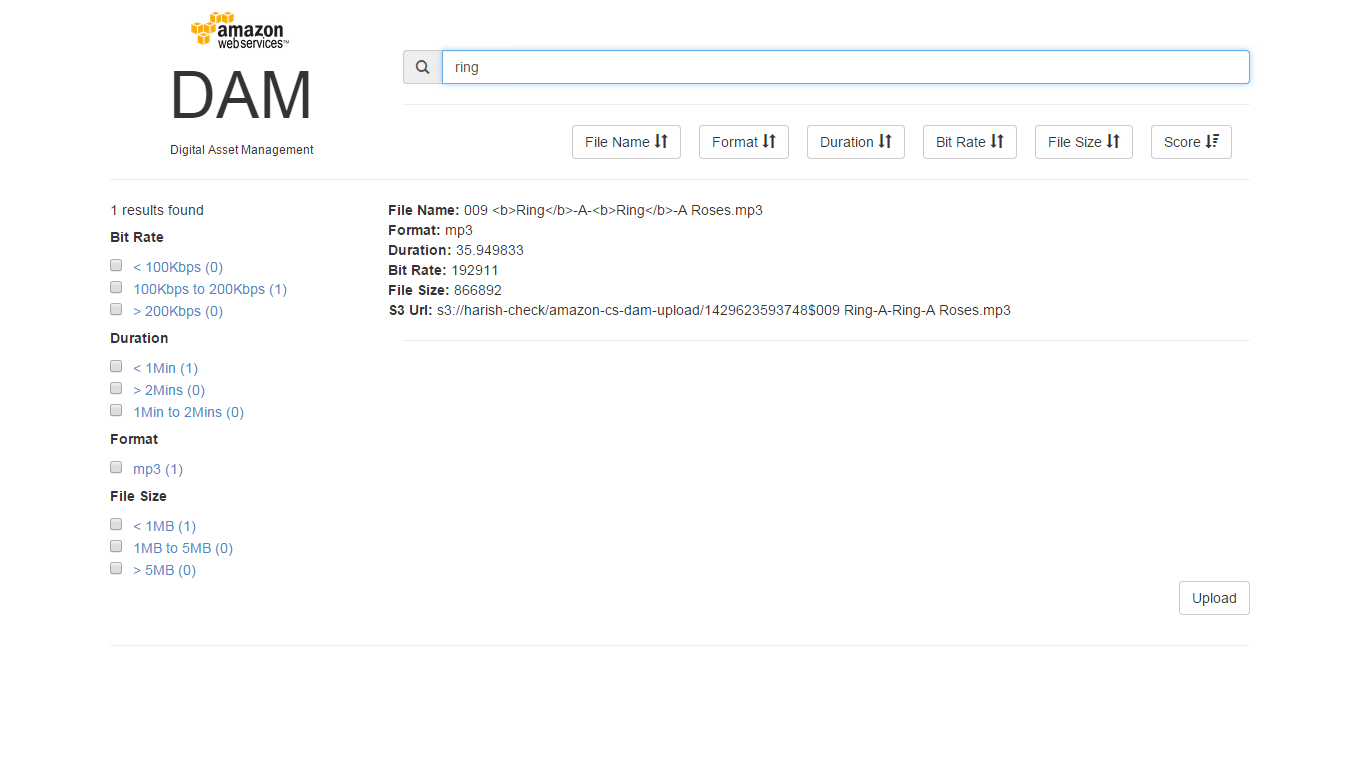
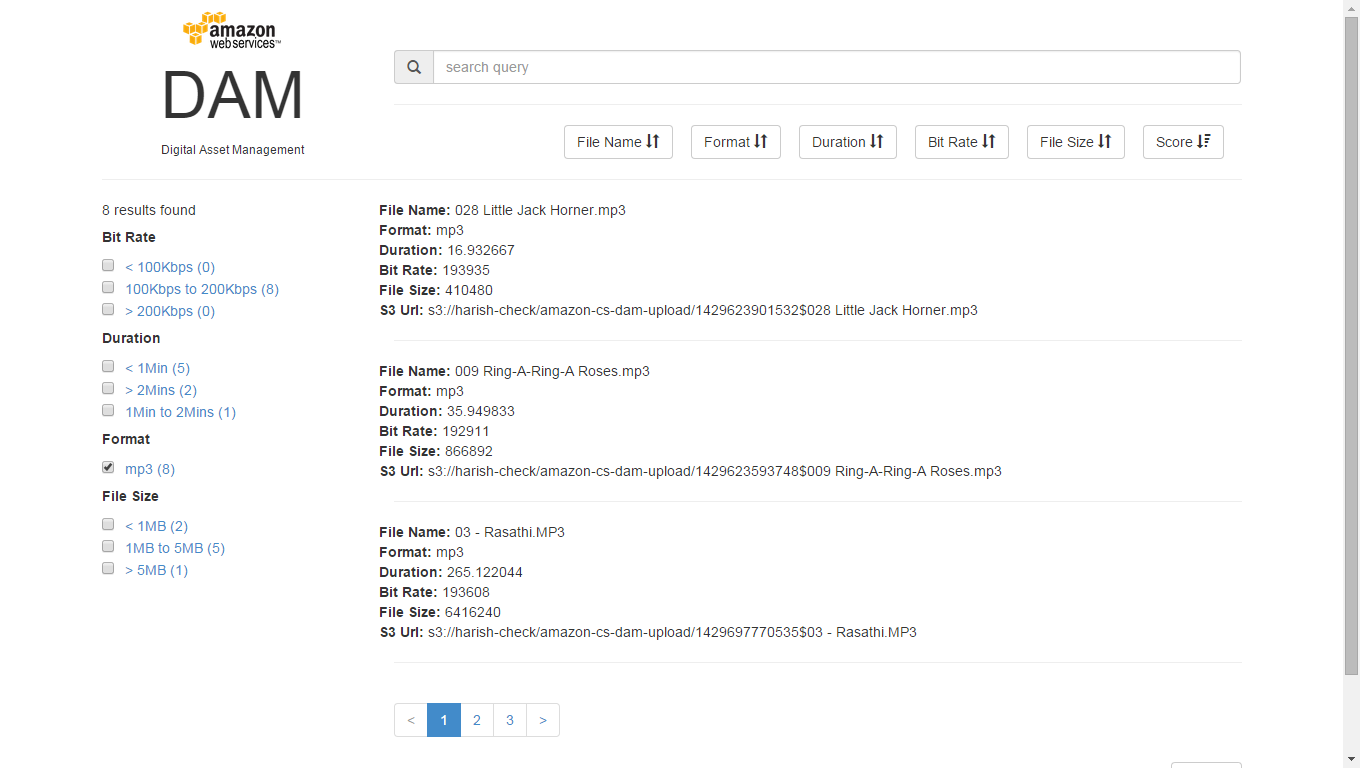 Search Faceting[/caption]